• Skip to main content
  • Skip to footer

BikeWalkNC

North Carolina’s advocate for safe cycling and walking

  • Home
  • Summit
  • News + Advocacy
  • Safety + Education
  • About Us
  • Join/Donate
  • search

Search Results for: where should i ride

Nov 19 2014

Teaching the Traffic Bicycling Class

The Traffic Bicycling for Transportation Professionals class is an all-day intensive workshop designed for transportation planners, traffic engineers, public safety advocates, and law enforcement officers. The information covered is a superset of the League of American Bicyclists Traffic Skills 101 class. League Cycling Instructors may announce and teach the class according to League guidelines for TS101 and award TS101 certificates. A future version of the class may be created to align with the ABEA CyclingSavvy curriculum for those interested in that program.

Curriculum Philosophy

The philosophy of the curriculum is to present transportation professionals with a comprehensive and consistent concept of operations for successful bicycling in traffic. The class starts with first principles of bicycle handling to establish the maneuvering characteristics and required operating space for bicycling. (This required operating space is much wider than many people realize; the students’ inevitable swerving when attempting to scan back for traffic drives this point home.) The class then presents human cognition principles and the basic rules of movement for traffic negotiation. These are practiced on quiet streets to reinforce the concepts. After this success, a typology and analysis of common bicycle crashes is presented to show how best bicycle driving practices address the causes of common crash types and minimize their likelihood. A variety of traffic challenges and facility types are discussed, with best bicycle driving practices identified for each. The class then rides in rush hour traffic on more challenging streets, followed by the optional TS101 test for LAB credit. The PowerPoint slide show provided for this class includes speaker notes to help instructors understand the important points to be covered in class.

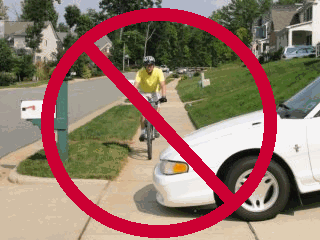
This class does not cover facility design. This class teaches best bicycle driving practices to build students’ insight into real-world traffic negotiation issues so that they can evaluate facility design options on their own. Various facilities are presented as challenges to the students so they can determine how to best handle them, and later (outside of class) reflect on the impact facility design can have on bicycle drivers.

Organizing the Class

The first step in organizing the Traffic Bicycling class is to secure a classroom space and parking lot for drills at least a month in advance. The top level of a parking deck works well for the drills. City transportation officials or university staff may be able to provide these for you free of charge (networking helps here). Establish the room seating capacity and subtract 20% to determine the number of students you can accommodate (you need room for assistant instructors; at least one LCI per every five students is recommended).

Advertising the class to your target audience comes next. Work with local advocates and transportation professionals to get the word out.  Be sure to advertise the class on the League web site per LAB requirements so the class will be insured. You may want to use an event ticketing web site like EventBrite to track registrations and collect payments. Advance payment is important to ensure people show up. Please consider donating proceeds to BikeWalk NC or splitting the proceeds.

As you get a better idea of the size of your class, invite the LCIs you will need for assistance (one per every 4-5 students) and print the class materials. Materials for the class are available online via the links below:

Print one per student:

Class Agenda (can be edited)

TS101 Registration Form

TS101 Road Scoring Form

TS101 Student Test

TS101 Answer Sheet

TS101 Feedback Form

TS101 Certificate (use heavy paper)

Print one per instructor:

TS101 Handling Drills Diagrams

TS101 Avoidance Drills Diagrams

Materials not for printing:

Traffic Cycling PowerPoint Slide Show Presentation with speaker notes (can be edited)

Student Manual

PDF of Traffic Cycling slides with speaker notes (for reference, not presentation)

Alternative Materials

Sharing the Road with Bicyclists (Motorist Briefing)

A week or so prior to the class, send all students a link to the Traffic Bicycling class preparation page and recommend that everyone complete the homework tasks assigned on it. Multiple reminders may be helpful. Send them clear directions to the classroom location and any parking instructions.

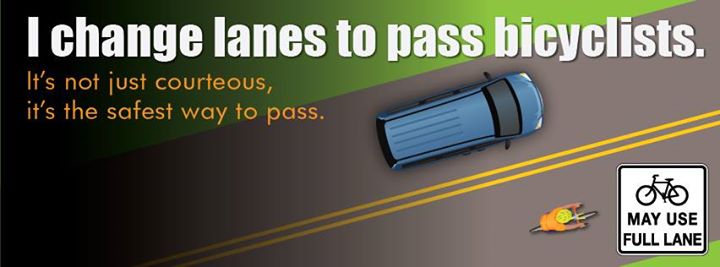
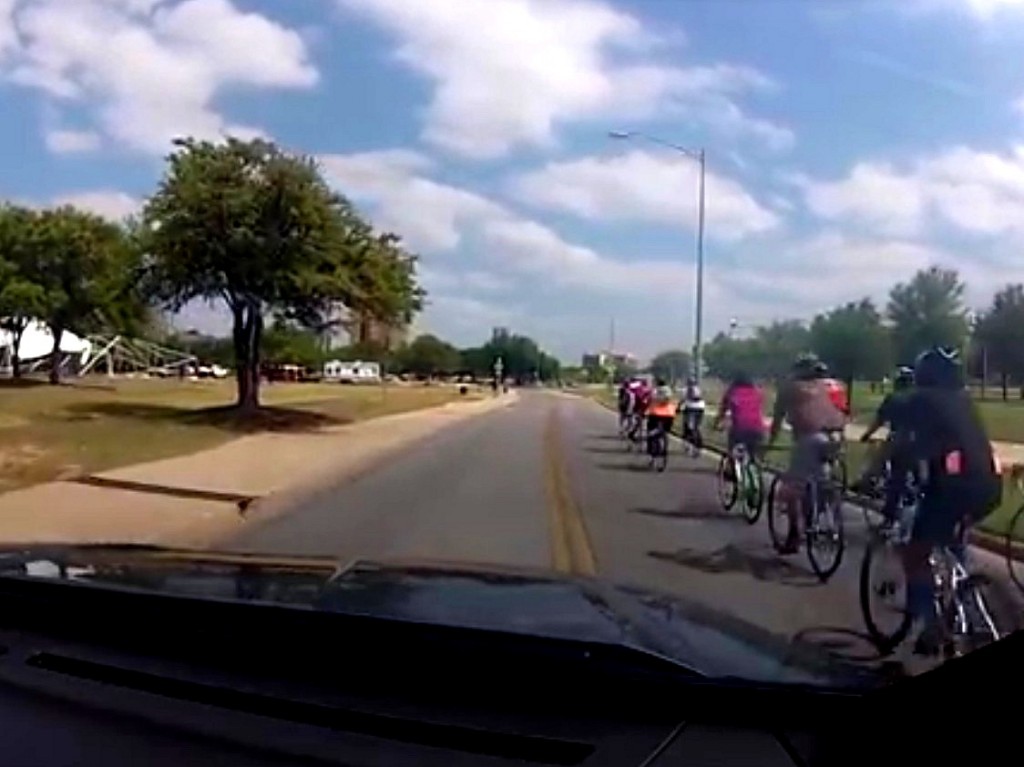
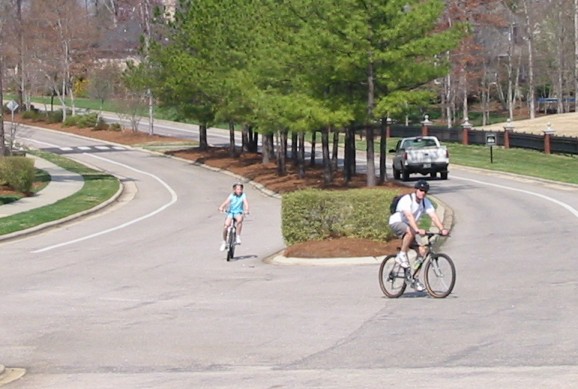
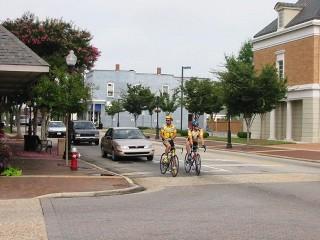
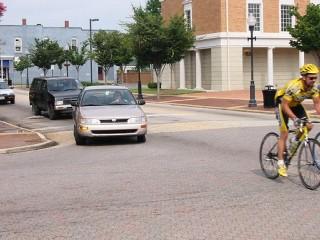
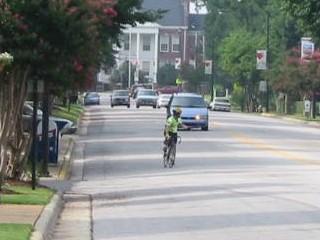
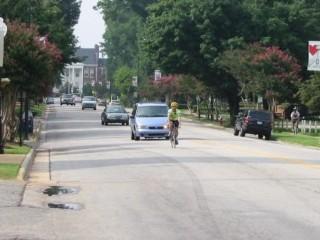
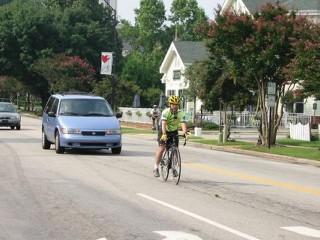
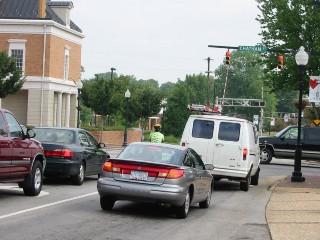
Choose on-road routes that meet the LAB requirements (max 35 mph streets, various lane configurations), with the final road ride including areas with significant traffic, but not bumper to bumper congestion. Historic downtown streets are often preferable. Lots of left turns should be included. Make sure you ride the routes before choosing them, and make sure all LCI assistants have cycled them beforehand as well.

Running the Class

Time is very tight on this class. Start promptly, and do not go off on lengthy tangents.  Do ask students questions frequently as part of the teaching process (Socratic method) and encourage discussion in order to keep them engaged. If students want to debate an issue, table it until after class. Run the parking lot drills as efficiently as possible, with multiple groups doing different drills in parallel with different instructors. Keep everybody moving except when an instructor is presenting the drill.

We find that running the parking lot drills in a time-efficient manner is the biggest challenge in this class. We recommend lining everybody up to do the ABC Quick Check, straight line and scan/signal drills as one group before breaking up into three separate groups to do the avoidance drills (quick stop, instant turn and rock dodge). We normally skip the avoidance weave to save time.

For the transportation professionals in this class, We emphasize the relationship between facility design and what they experience while executing the handling drills. In particular:

Straight line scan/look back: Invite them to think about how much they swerved while looking back, and what this implies for the necessary size of their safe operating envelope and shy distance to both overtaking traffic and the pavement edge. This is very important when considering sharable lane width and the sum of bike lane plus travel lane width.

Instant turn: We don’t push speed/performance to the transportation planners here, but instead talk about turn planning. The students will turn wider and use more space than they expect; invite them to consider the implications for minimum turn radii and path width/curb cut width at path intersections for bicycling.

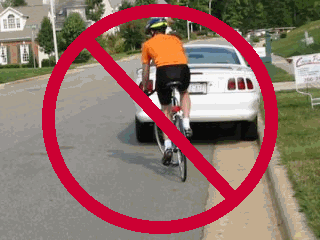
We will also demonstrate door zone distance with a parked car at the end of the parking lot drill. It’s best to have a two door car with really wide doors available for this.

After the class, if students ask for a copy of the slides, you can send them a pdf copy. Discourage distribution of this to people who have not yet taken the class. The verbal and physical content is much greater than the visual content, so the slides do not do the class justice.

Thank you for helping to “teach the teachers” and make our state better for bicyclists!

Written by steven · Categorized: Education

Aug 25 2014

Safe Passing and Solid Centerlines

Change Lanes to Pass
Graphic by Keri Caffrey

Update: Since the time this article was written, the State Legislature has legalized passing a bicyclist in a no-passing zone when done safely with no oncoming traffic and adequate sight distance, passing at a distance of at least four feet or moving completely into the next lane. See § 20-150. Limitations on privilege of overtaking and passing.

Narrow two-lane state roads are important travel routes for commuting and recreational bicyclists in North Carolina. Every day thousands of motorists pass bicyclists on these roads without incident. When there is little or no shoulder and the travel lane is narrow, competent drivers recognize that there isn’t room to pass within the bicyclist’s lane, and so they wait until the oncoming lane is clear of traffic for an adequate distance before moving into the next lane to pass. In many places where this occurs, a solid yellow centerline is striped to discourage passing of other motor vehicles. Traffic engineers place this striping where there is not adequate distance to safely pass a motor vehicle that is traveling near the maximum posted speed limit. But in the real world, drivers recognize that the distance required to pass a slow moving bicyclist is a small fraction of this distance, and invariably ignore the striping in favor of weighing the safety and convenience of passing under the existing conditions. Drivers routinely cross solid centerlines to pass bicyclists safely, and police routinely ignore this as long as the passing driver does not create a danger for oncoming traffic. Does this mean that it is legal?

Law enforcement officers are often asked this question – and are often uncomfortable responding. In states lacking clarifying language in the traffic laws, police may struggle to find legal support for ignoring solid centerlines when conditions are clearly safe for passing. Some states – Colorado, Maine, Mississippi, Ohio, Pennsylvania and Wisconsin, for example – have traffic laws explicitly allowing drivers to cross a solid centerline to pass a bicyclist under safe conditions. BikeWalk NC recommends that North Carolina adopt similar language. In the meantime, police in NC are in the same position as those in states such as Florida and Texas, where police have turned to the laws that govern driving around disabled vehicles and fallen trees to justify not ticketing prudent drivers. In North Carolina, this is § 20-146 (a)(2):

§ 20-146. Drive on right side of highway; exceptions.
(a) Upon all highways of sufficient width a vehicle shall be driven upon the right half of the highway except as follows:
(1) When overtaking and passing another vehicle proceeding in the same direction under the rules governing such movement;
(2) When an obstruction exists making it necessary to drive to the left of the center of the highway; provided, any person so doing shall yield the right-of-way to all vehicles traveling in the proper direction upon the unobstructed portion of the highway within such distance as to constitute an immediate hazard….

N.C. Highway Patrol 1st Sgt. Brian Gilreath provided the following explanation quoted in the 8/19/2014 Citizen-Times:

As long as you don’t affect the movement of oncoming traffic — that’s where common sense comes in — you’re allowed to go left of center to avoid hazards and obstructions in the roadways,” Gilreath said. “Take for example if a farmer drops a bale of hay in the roadway, and you need to go around it. Even though you’re left of center, you have not violated the law. […] An officer would have a hard time convincing a judge that you’re supposed to ride behind a bicyclist for 10-15 miles…. [Citizen Times, 8/19/2014]

This aligns with the pragmatic interpretation that the Florida Department of Law Enforcement approved for the Florida Bicycle Law Enforcement Guide:

The prohibition of passing in a no-passing zone does not apply when an obstruction exists making it necessary to drive to the left of the center of the highway [§316.0875(3)]. Thus, when a cyclist is traveling so slowly as to constitute an “obstruction,” a motorist may cross the center line in a no-passing zone to pass the cyclist if the way is clear to do so, i.e., when it can be seen that any oncoming traffic is far enough ahead that the motorist could finish passing before coming within 200 feet of an oncoming vehicle.

Police in Austin Texas, a state with similar passing laws, produced a video showing how to pass bicyclists by waiting until it is safe to cross a solid centerline.

AustinPolicePassing


BikeWalk NC hopes that other police officers in NC will leverage this interpretation of § 20-146 so that they can have more practical and meaningful discussions about safe passing techniques on narrow roads by focusing on traffic conditions and sight distances. However, explicit clarifying language in the passing law is preferred for bicyclists, tractor drivers, and other slow moving vehicle operators, because such users don’t want to be framed as “obstructions.” Slow moving vehicles are legitimate traffic, and in some cases, bicyclists aren’t slow-moving. A more nuanced, realistic alternative is needed for North Carolina’s one-size-fits-all no-passing-zone law.

Written by steven · Categorized: Education · Tagged: centerline, law, passing, yellow

May 13 2014

Bicycling with Children


children_boyonbike2

Cycling is a great way to spend active family time outside.

Benefits

Bicycling is a popular, fun, healthy, and useful activity that people can do their entire lives. Bicycling provides low-impact exercise of variable intensity that improves health, fitness, longevity, mental focus, emotional balance, and stress levels.  Traveling by bicycle is often more enjoyable and affordable than other modes, and can be more convenient where automobile parking is limited. Teaching children to travel effectively by bicycle as they get older develops patience, discipline, self reliance and personal responsibility.  Learning to negotiate traffic by bicycle also teaches essential driving skills that will make them safer and more courteous motorists later.

Risk Management

Per hour of activity, bicycling has an injury rate similar to common sports such as soccer, and a fatality rate lower than swimming and similar to that of automobile travel.  The health benefits of bicycling outweigh any health risks by an order of magnitude in terms of disability adjusted years of life.  Like swimming and motoring, the safety of bicycling is determined primarily by behavior; education and skill development are key to success.   As a bicyclist’s skills and maturity progress, safe bicycle travel becomes possible in an increasingly wide variety of environments. An important consideration for cycling with children is matching route selection and adult supervision to the developmental and skill levels of the child.

Children as Passengers

Many parents enjoy bicycling with children as young as one year old (when they can safely support their own weight and sit themselves upright) by using a variety of child trailers and seats.  Transporting children as bike passengers allows parents to start modeling successful bicycling behavior early and helps interest children in bicycling.

children_biketrailer

Bike trailers let kids ride while you stay in control.

 Enclosed two-wheel child trailers are ideal for children under four years old; the low center of gravity avoids affecting the parent’s balance on the leading bicycle, provides good handling, and minimizes the potential for a fall-related injury (the vast majority of injuries to kids cycling).  Such trailers also provide room for toys and snacks inside the compartment, keeping little ones happy during the ride.  Somewhat older children will prefer trailercycles, aka trailer bikes, which attach to the back of the parent bicycle and feature one wheel, a seat, handlebars, and pedals to assist with the work.  These trailers require more maturity and cooperation from the child and can be more difficult for the parent to control due to the higher center of gravity.  Tandem bicycles are another option, and can be configured to work for children of various sizes as long as the child can stay seated. Child carrier seats are also available, and are usually the most affordable option for transporting children. However, a child in a carrier seat can make a bicycle top heavy and difficult to control, especially when mounting and dismounting.

Are We There Yet?

Long bike rides can be tiring or tedious for children; it’s useful to start small and break up longer trips with stops every 20 minutes or so.  Planning a round trip to a destination of interest such as an ice cream shop, restaurant, or park works especially well.

children_reststop

Water and snack breaks keep kids happy.

Teaching Cycling to Children

The essential skills required for safe cycling can be learned through informal mentorship (e.g. knowledgeable parents or other experienced cyclists), organized classes, or a variety of media.  Children can learn bicycle handling skills very quickly, but take much longer than adults to learn traffic negotiation skills due to developmental factors and are limited in what traffic situations they can handle until they reach their teens. This requires that a child’s learning objectives and cycling environment be carefully selected by the parent or educator to match the child’s cognitive development and maturity.

Basic bicycle handling includes starting and stopping, steering, riding in a straight line without swerving, looking back over one’s shoulder without swerving, and emergency braking. These skills should be taught in areas void of traffic, including other bicycle traffic.

Stopping at the Edge

An essential traffic behavior that must be learned by children as soon as they start bicycling is to stop when they reach the edge of a driveway, path, or sidewalk.  The most common cause of car-bike crashes involving children is when the child rides out from a driveway, path or sidewalk into the roadway without stopping and yielding to other traffic.  Children often have “tunnel vision” that  causes them to overlook or ignore threats outside their direct line of sight, and often lack the maturity to stop and look both ways when they are not aware of traffic in advance of reaching the edge.

Riding with their child affords a parent the opportunity to supervise their child’s cycling, especially at edge locations such as street crossings.  Practically all bicycling trips, including greenway rides, include intersection crossings and/or entrances into vehicular areas.  Parents should model consistent behavior by stopping and looking both ways before proceeding, and invite the child to assist in assessment of traffic conditions.

children_girlonbike

Kids’ enthusiasm for cycling easily outpaces their ability to understand traffic. Parents need to limit their children’s destinations and routes based on their cognitive ability and maturity.

The Sidewalk Dilemma

Although many parents and children are tempted to think of sidewalks as safe places for children to ride, traveling any distance on a sidewalk inevitably results in crossing intersections and driveways or crossing roadways mid-block.  Such movements are associated with the most common collision types for child bicyclists, in part because of children’s errors, but also because motorists are less likely to notice bicyclists entering their path from sidewalk locations when they are focused on traffic approaching in the roadway. The most common type of car-bike crash in urban areas of NC involves a bicyclist riding on the sidewalk being struck by a motorist pulling out from a stop sign, red light, or driveway. Parents should consider all such conflict locations when deciding where they will permit their children to ride, and should supervise any and all crossing movements as needed depending on the maturity of the child.  In general, if a child does not have the maturity to bicycle safely on the roadway portion of a particular corridor, the child probably lacks the ability to handle the more challenging intersection conflicts that accompany sidewalk cycling on that corridor – at least, without supervision.  A suggested rule of thumb is to limit children’s bicycling to those areas where they are capable of safely negotiating the intersections as well as riding safely in the roadway itself.

Riding Right

A leading contributor to car-bike crashes is bicycling on the wrong side of the road.  At intersections, where the vast majority of car-bike collisions happen, other drivers aren’t expecting or looking for traffic approaching from the wrong direction. Between intersections, a wrong-way bicyclist requires a driver to make evasive maneuvers to avoid them; the driver cannot simply slow down and wait for a safe passing opportunity as they can with a same-direction bicycle traffic.  For these reasons, traffic laws everywhere require bicyclists to ride on the same side of the road in the same direction as other vehicle traffic. In North Carolina, bicycles are defined as vehicles and bicyclists have the full rights and duties of drivers of vehicles.

Children should be taught to ride on the right half of any corridor, including greenway paths and neighborhood streets.  In combination with this, they need to learn to ride in a reasonably straight line, without suddenly swerving, so that other bicyclists and automobile drivers can travel beside them and pass them safely. They should choose an imaginary straight line down the roadway that keeps them safely away from surface hazards and parked cars. Prior to making an adjustment in their lateral position on the roadway, such as when noticing a parked car ahead, the bicyclist must look back and scan for traffic that may be about to overtake them, and only make the lateral movement when it can be made safely.  Simply riding in a straight line well out into the roadway is not hazardous to bicyclists of any age, especially on the neighborhood streets where most children ride.  What is hazardous is suddenly moving into that position unpredictably when a driver is too close to reduce speed.

Supervising as Wingman

When riding with a child to supervise their bicycling, an ideal riding position is slightly behind and to the left of the child, with the child setting the pace. This position allows the parent or instructor to watch and communicate with the child, while also diverting overtaking traffic to pass at a larger distance from the child. The extra passing distance provides the “wiggle room” the child may require as their skill develops and makes the ride more comfortable for them.

Route Selection

Children between the ages of 7 and 10 can develop the traffic and handling skills to operate safely on low speed, low traffic two-lane residential streets.  By their early teens, they can develop the skills to handle multiple lane streets.  Although some cyclists may prefer more direct, important roads depending on their travel objectives, low traffic streets and greenways are often the most enjoyable places to ride for a wide variety of cyclists. Some cities provide maps that highlight low traffic streets and greenway routes; these can be of tremendous value in finding an enjoyable route for recreation or transportation.  Google Maps includes most of the local greenway trails, which can be used when generating travel routes for bikes.  The satellite and street view features of Google Maps are useful for determining the cross section and character of a street when choosing a route.

Older cities often have a grid of low traffic streets that provide alternatives to busy roads.  This is less common in some newer suburbs, but many progressive municipalities now actively pursue development of collector street networks and local street connectivity to provide redundant travel routes and to disperse traffic bottlenecks.  This allows many bicycle trips to be made on lower speed limit roads and two lane roads with wide pavement that afford easy passing at safe distance.  Some cities have also developed an extensive interconnected system of greenway paths in their own rights of way. By combining pleasant streets and greenways, a wide variety of enjoyable low-traffic cycling routes becomes available for family cycling.

children_kidleftturn

Older children can develop intersection negotiation skills that greatly expand the range of routes available to them.

Keeping Tabs

Even after learning good cycling practices, kids usually start taking risks and short-cuts when they leave their parent’s sight, and are quick to emulate the bad habits of their peers. Parents can reinforce good practices by riding frequently with their children and discussing the reasons behind the rules.  Parents can also monitor their children’s cycling behavior alone or with peers by catching up on them with their own bikes at unexpected times.  Lastly, parents should always model good behavior when operating any vehicle.

For More Information

BikeWalk NC Traffic Bicycling Guide

NCDOT Bicycle Driver Manual: Streetwise Cycling

League of American Bicyclists Better Cycling Tips: https://www.bikeleague.org/bfa/toolkit

 bts2014

Written by steven · Categorized: Education

May 13 2014

Basics of Bicycle Driving

Bicycle driving is much like driving a car, because the same basic rules of the road apply. (See actual NC statute wording here.) These rules can be expressed in priority order as follows:

  1. Yield to traffic already on the road (first come, first served)
  2. Drive on the right half of the roadway
  3. Yield before entering a more important roadway
  4. Yield before moving laterally or turning
  5. Destination positioning at intersections
  6. Speed positioning between intersections

However, two-wheeled vehicles are narrower than cars. This compels bicycle operators to pay more attention to their visibility and position in travel lanes in order for their movements to be predictable to other road users. Also, bicyclists often travel slower than other traffic, which means cyclists must be aware of when and where other traffic may be overtaking, and sometimes take steps to manage that overtaking.  This article provides real-world examples to illustrate how cyclists can employ the basis rules of the road to optimize their safety and efficiency when negotiating traffic.

1. Yield to traffic already on the road (first come, first served)

Faster drivers must yield to slower and stopped traffic ahead.  All vehicle operators must travel no faster than is safe and will allow them to stop within their sight distance.  As a bicyclist, you have a right to use the roadway, and other drivers are legally required to respect your right of way, but you must act visibly and predictably to allow them to do so.

2. Drive on the right half of the roadway

Always ride on the right-half of the road, and not on the sidewalk.

basicdriving_img16

Wrong-way cycling is a leading cause of car-bike crashes. Right-turning drivers scan for vehicle traffic coming from their left, and often turn directly into the paths of wrong-way cyclists. Drivers are often surprised by the presence wrong-way cyclists, and neither party may be able to stop in time to avoid a crash. The impact speed equals the car’s speed plus the cyclist’s speed. Never drive a vehicle against traffic. RIDE RIGHT.

basicdriving_img17

Sidewalks are designed for pedestrian speeds; drivers do not expect vehicles on sidewalks and generally drive across them without scanning for anything moving faster than a pedestrian. Operating on the sidewalk makes you less visible and you cannot use destination positioning at intersections. Studies have shown that car-bike crash rates are several times higher for cyclists on sidewalks than for cyclists operating on the adjacent roadway sections. When falls and collisions with pedestrians, dogs, and other obstacles are considered, we find that cycling on sidewalks results in many times more injuries per mile than cycling on major roads without special bike facilities.

3. Yield before entering a more important roadway

Obeying traffic signals and signs makes you predictable to other drivers, and is the safest way to ride. Having an equal right to roads means also having equivalent responsibilities.

basicdriving_img9

These cyclists don’t mind waiting their turn to use the intersection. They stay behind the crosswalk to keep it clear for pedestrians, and stay far enough from the curb to avoid being cut off by right-turning drivers.

basicdriving_img10

Once the cyclists have proceeded ahead on a green light, the following driver can turn right safely.

Sometimes, when no other vehicles are in the cyclist’s lane, a demand-activated traffic signal will not turn green for the cyclist. These intersections use inductive loop sensors–loops of buried wire–that detect conductive objects, but may not be properly designed or adjusted to detect bicycles. The pavement cuts for these wires are often visible in the surface of the asphalt. By positioning your bike in the most sensitive part of the loop, you may be able to trip the sensor. For a loop shaped like a figure-8, the most sensitive spot is above the wires in the center part of the ’8?. Single loop detectors are harder to trip, but the most sensitive spot to position your bike rims is near the wire on either side of the loop. Leaning the bike frame toward the ground in the center of the loop with the wheels touching the ground just above the wire cut may help.  If the traffic signal cannot detect you and no other vehicles are in sight, treat it like you would normally a broken traffic light by stopping and waiting until it is safe to proceed by yielding to all other traffic. Be sure to report the signal to the town’s engineering department so they know that it does not work properly for bicycle drivers.

4. Yield before moving laterally or turning

Preparing for turns, and avoiding obstacles all require moving laterally on the road. It’s essential to LOOK BACK and to the side before any lateral movement in order to yield properly and avoid violating the right of way of other road users. Doing so without swerving requires some practice, but is easy to learn. To practice the LOOK BACK, ride on a straight line or marking in an empty parking lot or deserted road. Try to keep your tires on the line as you turn your head and twist your shoulders around and then straight. Be sure to practice turning in both directions for both leftward and rightward lateral movements. Start with both hands on the handlebars, then try combining the LOOK BACK with hand signals. Remember not to leave your head turned too long, because conditions in front of you can change fast.

basicdriving_img5

Always LOOK BACK  to see other vehicles and judge the space you need to merge when moving laterally. Hand signals can help you communicate your intentions, but don’t sacrifice control of your bike.

If a sufficient gap in traffic does not appear readily when you need to merge laterally, make a hand signal and look at the driver operating behind the space you’d like to merge. The driver will often see your signal and let you in. If not, try the next driver behind the first one, and so on. Someone will almost always let you merge. In some situations traffic is just too dense or too fast for this to work right when you want it to. Merging sooner, when a large gap is available, rather than later, when you really need to be in position, can make this easier. Merging very early may puzzle some drivers who aren’t used to seeing cyclists operate away from the curb, but it makes you easier to predict and is much safer than trying to merge too late.

basicdriving_img19

Never swerve in and out between parked cars or on and off of shoulders in an attempt to stay far to the right all of the time. You may swerve directly in front of an overtaking vehicle when nobody expects a conflict. Ride in a reasonably straight line, providing yourself enough usable pavement to maneuver safely, and stay at least 5 feet away from parked cars so you don’t get doored. LOOK BACK when you must merge laterally.

5. Destination positioning at intersections

When preparing to turn left, move laterally and approach the center line or use a left turn lane where available. When preparing to turn right, approach the rightmost side of the roadway or use a right turn lane. When proceeding straight, stay out of right-turn lanes and use the thru-lane instead.

basicdriving_img6

Merge into position early when preparing to turn left or when avoiding a right turn lane. If you wait too long you may be unable to merge and will be stuck in the wrong lane or position. Don’t risk swerving across the path of traffic at the last instant.  It’s far safer to get in line, even if other drivers must wait behind you for a few seconds. This way other users know where you intend to go.

basicdriving_img7

Use the rightmost lane headed to your destination. If the lane is narrow, occupy the center of the lane. If the lane is wide, you may decide to share it with another road user. Use the right part of a lane when faster users should to pass you on the left; use the left part of a lane when you want to allow right-turning drivers to pass you on the right.

basicdriving_img8

All of the drivers in the picture above know where the cyclist is going when the light changes: left. By merging early, the cyclist was able to properly position himself. There’s really no safe or legal way for a driver to turn left from the curb in traffic, but if you prefer, you can dismount and cross as a pedestrian in two signal phases by stopping at the opposite curb.

basicdriving_img20

These cyclists are about to go straight through this intersection, but they decided to pass other drivers on the right and then move onto the sidewalk. This makes them vulnerable to right-turning traffic and forces them to yield to or merge with straight traffic in the middle of the intersection before entering the narrow travel lane straight ahead.

6. Speed positioning between intersections

Slower drivers operate closer to the curb; faster drivers operate closer to the center of the road and pass slower traffic on the left.

basicdriving_img31

Some roads are  wide enough for motorists to pass cyclists safely while sharing a single wide lane. In more typical narrow lanes where this isn’t the case, it’s often safer for the cyclist to ride far enough into the lane to make it clear to motorists that they must move into the adjacent lane to pass. Riding closer to the center of the lane also makes you more visible to motorists who may cross your path at driveways and intersections, and keeps you away from hazards at the edge of the road.

basicdriving_img4

Avoid the door zone: Stay at least 5 feet away from parked cars to avoid being doored. It’s unlikely that you’ll be able to stop in time when someone opens a car door right in front of you, and you won’t have time to merge left safely. On some streets avoiding the door zone means you’ll be using an entire travel lane, but you’re allowed to do so to avoid the greater danger of suddenly striking an open door and being thrown left into traffic, or swerving left in an evasive maneuver. In either event, other drivers won’t have time to respond, but if you ride a straight line outside of the door zone, you won’t surprise other drivers.

Effective traffic negotiation requires you be predictable to other drivers, which implies that you also be visible. When cycling in darkness, be sure to use a white headlamp and a red rear lamp and/or rear reflector, as the law requires.

Written by steven · Categorized: Education

May 13 2014

Bicycling at Night

For good reason, North Carolina state law (§ 20-129.e) requires bicycles operated at night to be equipped with a white headlamp in front and rear reflector plus red lamp or reflective garment in back. Never ride at night without a headlamp and a rear lamp. Although most bicycles are sold with small “toy” reflectors, these are terribly inadequate for safe night cycling. The car-bike collision rate is several times higher at night than during daylight, but the vast majority of these crashes involve cyclists operating without proper nighttime equipment and can be easily prevented. Proper equipment makes cyclists visible to other road users and can make cycling at night much safer than statistics suggest that it is.

Proper bicycle lighting is important for two reasons:

  1. It makes you visible and predictable to other road users
  2. It can help you see well enough to avoid hazards and navigate your way

Being Visible and Predictable

Many cyclists ride in urban environments where they feel that they can see well enough to navigate, so they don’t bother with headlamps. This can be very dangerous, because without a headlamp other drivers often do not see them, even under street lamps. Reflectors can provide good visibility for overtaking traffic under some circumstances, but most dangers of car-bike collisions come from the front or side of the cyclist. The headlamp beams of vehicles on intersecting paths with cyclists often do not shine upon the reflectors of a bicycle until it is too late for the motorist to yield right of way or avoid collision. The figure below shows the positions of two vehicles that might be about to drive out or turn across the cyclist’s path

nightcycling_img20

Vehicle headlamps often do not illuminate the cyclist’s reflectors, creating a danger at intersections.

The photos below show the difference in visibility of a cyclist with and without a front headlamp.

nightcycling2
An approaching cyclist in the roadway under a street lamp, with no front light.

nightcycling3

A cyclist approaching in the same position as above, this time with a headlamp on the bicycle plus a helmet lamp.

Bicycle headlamps should emit a steady white (or nearly white) light because this indicates the direction that the vehicle is traveling. Most vehicles, including aircraft and boats, exploit a color convention to indicate orientation or direction of travel. For road vehicles, red lights belong in back, amber lights on the side, and white lights in front. The fact that reverse-gear lights of a motor vehicle are white provides an important cue as to what the motorist is about to do. It’s important for cyclists to comply with this convention in order for other road users to predict their actions. For instance, using a red lamp on the front of a bicycle is likely to cause opposite-direction divers to underestimate the closing speed between vehicles because they will expect the red-lighted object to be either stationary or moving in the same direction.

A red rear lamp or reflector makes a bicycle visible to overtaking traffic. It’s important to make this reflector or lamp large enough and bright enough to be seen by motorists at enough distance to slow or stop in time when traveling at high speeds. Color is generally less important on the rear of the vehicle, since overtaking motorists will not be any less cautious when viewing another color, but red is the convention and is a universally understood warning indicator. A variety of red LED (Light Emitting Diode) tail lamps available for bicycles; these lamps are visible at longer distances and a wider angles than are most reflectors, and don’t depend on vehicle headlights to be effective.

Note that side reflectors don’t hurt, but they are rarely of much use because if a vehicle’s headlamps are shining on them, you will either be riding ahead and out of the way before the vehicle arrives or it is already too late for the driver to avoid you. Pedal reflectors are more useful; some drivers report that pedal reflectors are even more conspicuous than tail lamps when approaching a bicyclist from behind. Reflective dots on shoe heels are an alternative for clipless pedal users.

Seeing What’s Ahead

The amount of light your headlamp needs to shine on the roadway in order to see your way depends on where and how fast you ride. A cyclist riding at high speed on a dark rural road needs a long, relatively narrow beam of light to see surface conditions and obstacles far enough ahead. A mountain biker riding over challenging off-road terrain needs a wide, bright beam to find suitable paths over obstacles and around turns. By contrast, an urban cyclist operating under street lamps may require just enough beam strength to allow navigation of the occasional dark stretch at reduced speed.

The faster you ride, the longer your effective headlamp beam needs to be; if you double your speed, you need to see twice as far. Note that since the perceived power of reflected light decreases in proportion to the square of distance from the lamp, doubling the range for a given reflection power requires four times as much light power from the lamp.  The light provided by a bicycle headlamp may be focused into a narrow beam for maximum range, or may be spread out for better peripheral vision. A low powered lamp can be focused into a beam suitable for high speed cycling on the darkest roads, but such a pattern will not give much illumination of turns. Any headlamp, even the cheapest clip-on battery kind, is much safer than none at all – you just need to ride slower to compensate for reduced range.

On totally dark roads, our eyes adapt to the darkness and allow us to see surprisingly well with a low-power headlamp. However, street lamps and the headlamps of oncoming cars can inhibit or reverse the adaptation of our eyes. This makes cycling on partially-lit roads or with oncoming traffic on rural roads more challenging with low-power headlamps. It’s a good idea to use the most powerful headlamp available for your cycling needs and your price range.

Special Hazards to See

Remember that motor vehicle traffic isn’t the only hazard at night. Don’t be surprised to find animals, unlit pedestrians dressed in black, and unlit wrong-way cyclists in your path at night. Look for them carefully, and give them wide berth when you see them. Also remember that it’s harder to see potholes and gravel. Also, wet road surfaces do not reflect as much light as dry roads, making driving lights (head and frame mounted white lights) less effective.

Increased Hazards from Motorists

On average, the percentage of highway users who are impaired by fatigue, poor night vision and alcohol increases at night. Drunk, drowsy, and severely distracted drivers are the greatest threat to lawfully operating cyclists at any time of day. Fortunately, the total number of motorists on the roads usually decreases at night. Many experienced night cyclists who use proper lighting report that overtaking motorists give them wider berth after dark. With reduced traffic and strong lights, it is arguable that the properly equipped night cyclist may actually be more visible and easier for motorists to avoid than the daytime cyclist.

Riding into the Sun

One situation which cannot be helped much by night equipment is poor cyclist visibility when riding directly into sunrise or sunset. Motorists are often blinded to the point that they can barely see more than the outlines of motor vehicles ahead of them. Under such conditions, the law requires drivers to slow down to a speed at which they will be able to respond safely, yet in too many cases they continue to drive at full speed. If possible, a cyclist may wait for the sun to set (you have your lights, right?) or to rise higher before riding. If you do ride into the sun, leave drivers a longer buffer of response time and distance when entering the lane in front of them.

Choosing the Right Equipment

Headlamps

A variety of bicycle headlamps are available depending on the user’s preference for range, light output, mounting style, and cost. Helmet mounted lights put the light where you’re looking. Bike mounted lights put the light near where your bike is going to be very soon. For maximum effectiveness, you can use both. Note that it’s also good to have a back-up light source or spare batteries.

The cheapest, shortest-range lights suitable for emergencies or occasional urban use are low-wattage clip-on lamps powered by disposable batteries stored inside the lamp housing. These lamps can get you home safely when you’re out after dark, and are good as a back-up, but most don’t have enough light output for high speed cycling on dark roads, they usually have limited range, and most of them eat batteries. Recent advancements in LED-based headlamps have greatly improved the range and light power of inexpensive battery-powered clip-on lamps.

nightcycling4

LED headlamps powered by AA batteries are now available in a variety of light powers and run times.

Rechargeable battery-powered lighting systems provide the highest light output (starting at around 250 lumens; most good ones are now well above 400 lumens), making them especially popular for mountain biking, and can offer operating times of over two hours between charges. Some even have fuel gauges and multiple power settings so you can control your range. The high power availability allows wide beam width which also maximizes visibility to other road users. Recent advances in battery and lamp technology provide increased power efficiency, lower battery weight, and easier charging, than previous battery-powered headlamp systems. However, these lamp systems usually cost over $50, often well over $100.

nightcycling5

This NiteRider LED headlamp with an internal Li-Ion rechargeable battery provides higher light lumens than disposable-battery lamps.

For unlimited range without the worry of battery maintenance, generators are the ideal choice. Many randonneurs swear by them, since their rides can exceed the operating time of a single battery lamp. Generators may be built into the front hub or attach to the tire. Early-generation generators would not provide any light with the bicycle stopped, would glow dimly at low speed, and could potentially burn out the lamp at high speed. Some modern generator systems use smart electronics to regulate power production such that the lamp is bright even at slow cycling speeds, and ensure there is no danger of burnout at high speeds. Some are even combined with power storage to provide illumination when stopped; the power storage recharges while the cyclist is moving. Generator powered lights reduce your speed capability somewhat because of the extra drag, which may be 10% of your pedaling effort. The most attractive and convenient generators, such as the Shimano DH-3N70 and the Schmidt Dyno Hub, are built into the front wheel hub. Bottle generators, such as the Dynosys LightSpin, rub against the tire.

Front strobes or flashers may also add to the cyclist’s conspicuity. However, these should not be used as a substitute for a normal headlamp.

Rear Reflectors

At close distance, when conditions are right, reflectors can be as visible as rear lamps – but conditions are not always right. Bicycle and automotive reflectors use the cube-corner reflection principle to reflect light back along the same path from which it came. This means that the observer’s eye must be very close to the light source – less than a two degree arc, in fact – to see a strong reflection. If the driver’s side headlamp is not turned on or working, the reflector may not be visible to the driver. The reflector must also be close to perpendicular to the observation angle.

Most bicycles come with small toy reflectors required by the Consumer Products Safety Commission (CPSC). These reflectors are too small to provide adequate visibility under many realistic road conditions, such as high-speed thoroughfares. A typical CPSC reflector provides only 1.7 square inches of directly exposed surface area and 1 square inch of surface angled to one side under optimum viewing conditions. The cyclist is better off replacing this rear reflector with a larger one from an automotive store. A 3? diameter round automotive reflector provides 7 square inches of reflector area. An oblong “trailer” reflector provides six square inches.

Note that an amber reflector is 2.5 times as bright as a red reflector under the same headlight illumination. By law, a red reflector is required, but adding an amber reflector to the red one is a good idea. With this combination, you’ll be over ten times brighter than with just one toy CPSC reflector.

Reflectors are very sensitive to mounting location and orientation. Reflectors on the frame should be mounted low to reflect the lights of other vehicles sooner. The face of the reflector should be perpendicular to the ground. If the rear reflector is where it may be sprayed by mud from the tire, clean it often.

Tail Lamps

Inexpensive tail lamps, typically employing red, energy-efficient light emitting diodes (LEDs), don’t rely on a motorist’s headlamps to be visible, are visible from farther away, and can be seen clearly from the side as well.


nightcycling6

The Planet Bike Superflash Turbo is a 1 Watt LED tail lamp that is daylight visible and will get you noticed at night from a mile away.

These lamps will last many hours on a pair of disposable batteries. However, they often glow dimly long before they fail; it’s important to inspect them before each ride and change the batteries regularly. Above all, use a reflector in addition to the tail lamp so you have a backup. Note that many of the clamp-on mounts for tail lamps and reflectors are easily knocked out of alignment. Be sure to inspect them often, and consider using more than one retro-reflective device on separate mounts in case one gets misaligned without you noticing it. (Once, after hitting a pothole, the author discovered that the shock had caused the cover of his VistaLite tail lamp to pop off and dump its batteries with it. Were it not for a secondary reflector, the bicycle would have had no rear-facing visibility equipment for the remainder of the trip. A band of electrical tape around the perimeter of the lens can keep this from happening and also seal out water.)

Steady versus Pulsating versus Flash

There is some controversy over whether pulsating tail lamps are better than steady tail lamps. A rapid pulse is better than a slow flash, because it is easier to track visually. (Remember the difficulty of catching fireflies between flashes?) The rapid pulse also grabs attention more readily at long distances than does a solid lamp. Proponents of steady lamps say steady lamps are just as visible at short distances, which they say is what counts, that steady lamps are potentially less annoying or distracting, and that there is little use in looking different from other traffic.  Proponents of flashing lamps believe that it is useful to alert motorists to the presence of a special road user (a bicyclist) farther ahead so the motorist can better prepare in advance to overtake with caution.  Also, flashing lamps use much less average power to achieve the same maximum instantaneous brightness.

Reflective Clothing

Lights are essential for visibility under all conditions. However, retro-reflective clothing may help approaching drivers estimate your size and distance more easily and accurately than can just a single lamp or reflector. Ankle or pedal reflectors move and attract attention. Reflective material on a jacket or glove also help you convey hand signals at night. Remember that retro-reflective clothing supplements, but never replaces, good lights and bike-mounted reflectors.

Written by steven · Categorized: News

  • « Go to Previous Page
  • Go to page 1
  • Interim pages omitted …
  • Go to page 7
  • Go to page 8
  • Go to page 9

Footer

Follow Us

FacebooktwitterlinkedinyoutubeinstagramFacebooktwitterlinkedinyoutubeinstagram

© 2022 BikeWalkNC · P.O. Box 531, Cary, NC 27512 · (919) 998-6323 · Contact Us